Four months ago I took on the biggest challenge ever! A word chart is what it is called. I’ve never heard of them and had no idea what I was really getting in to. To this extent, at least.
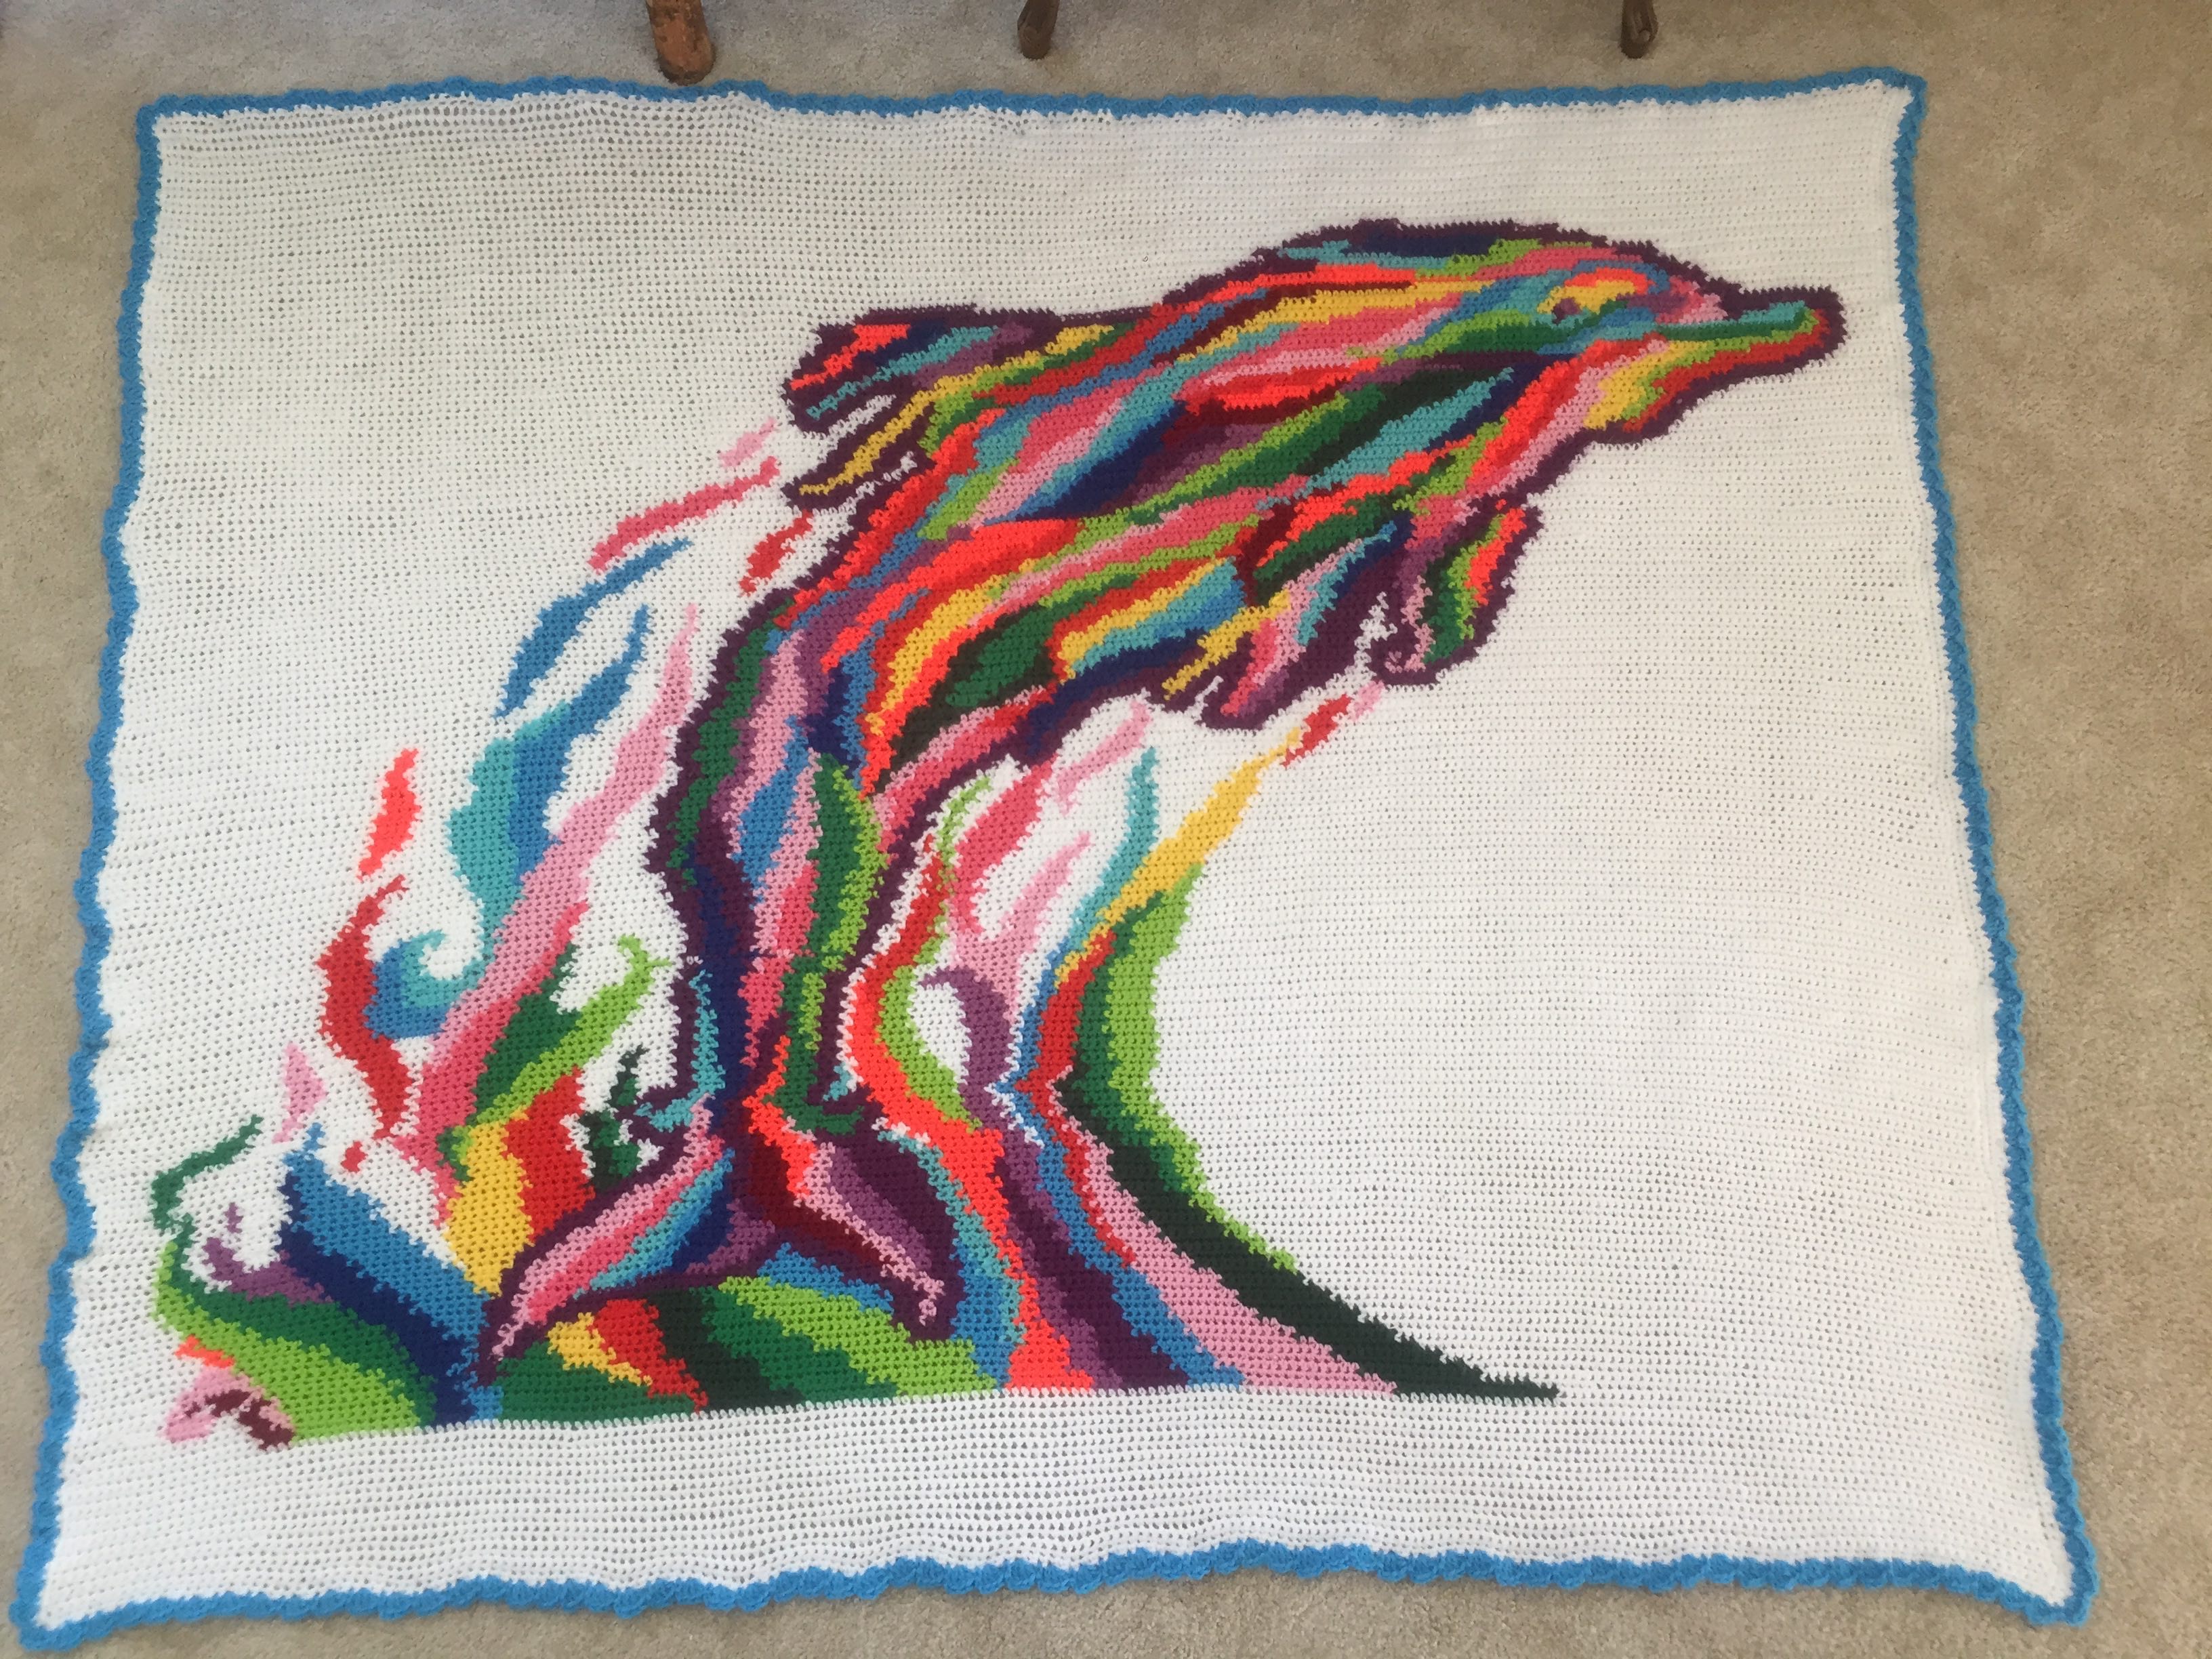
I started with a Rainbow Dolphin Word Chart found here: http://www.crochetwordcharts.com/Rainbow-Dolphin-Art-Square-Word-Chart_p_913.html
I used an “I” hook and “I Love This Yarn”. It took me a month and I was so disappointed when I actually laid it out and noticed how loose I had been at the beginning of the project, but as I tried weaving in all the tails while crocheting over them, I got tighter and tighter. I am telling you this because I don’t want anyone else to ever go through it. What I learned what worked best for me was to weave the tails in using my tapestry needle. It works much better, at least for me. Here is the finished product, after I blocked it and added a border to try to make it look decent.
Here is how I FIRST had bobbins hanging from the project. It was a continual tangle. Also, this project took me over a month to do. There had to be an easier way to do these bobbins!
On to my next project (word chart). I asked a lady who has a site: http://crochet4christ.com if she could create a pattern for me that was a stained glass cross. A few days later I received word the pattern was ready and I was excited! I could not wait to start it. Since I had many colors of “I Love This Yarn” I chose to use it again for the stained glass cross, only having to purchase a few skeins. The pattern called for Caron Simply Soft. I matched my colors as best I could.
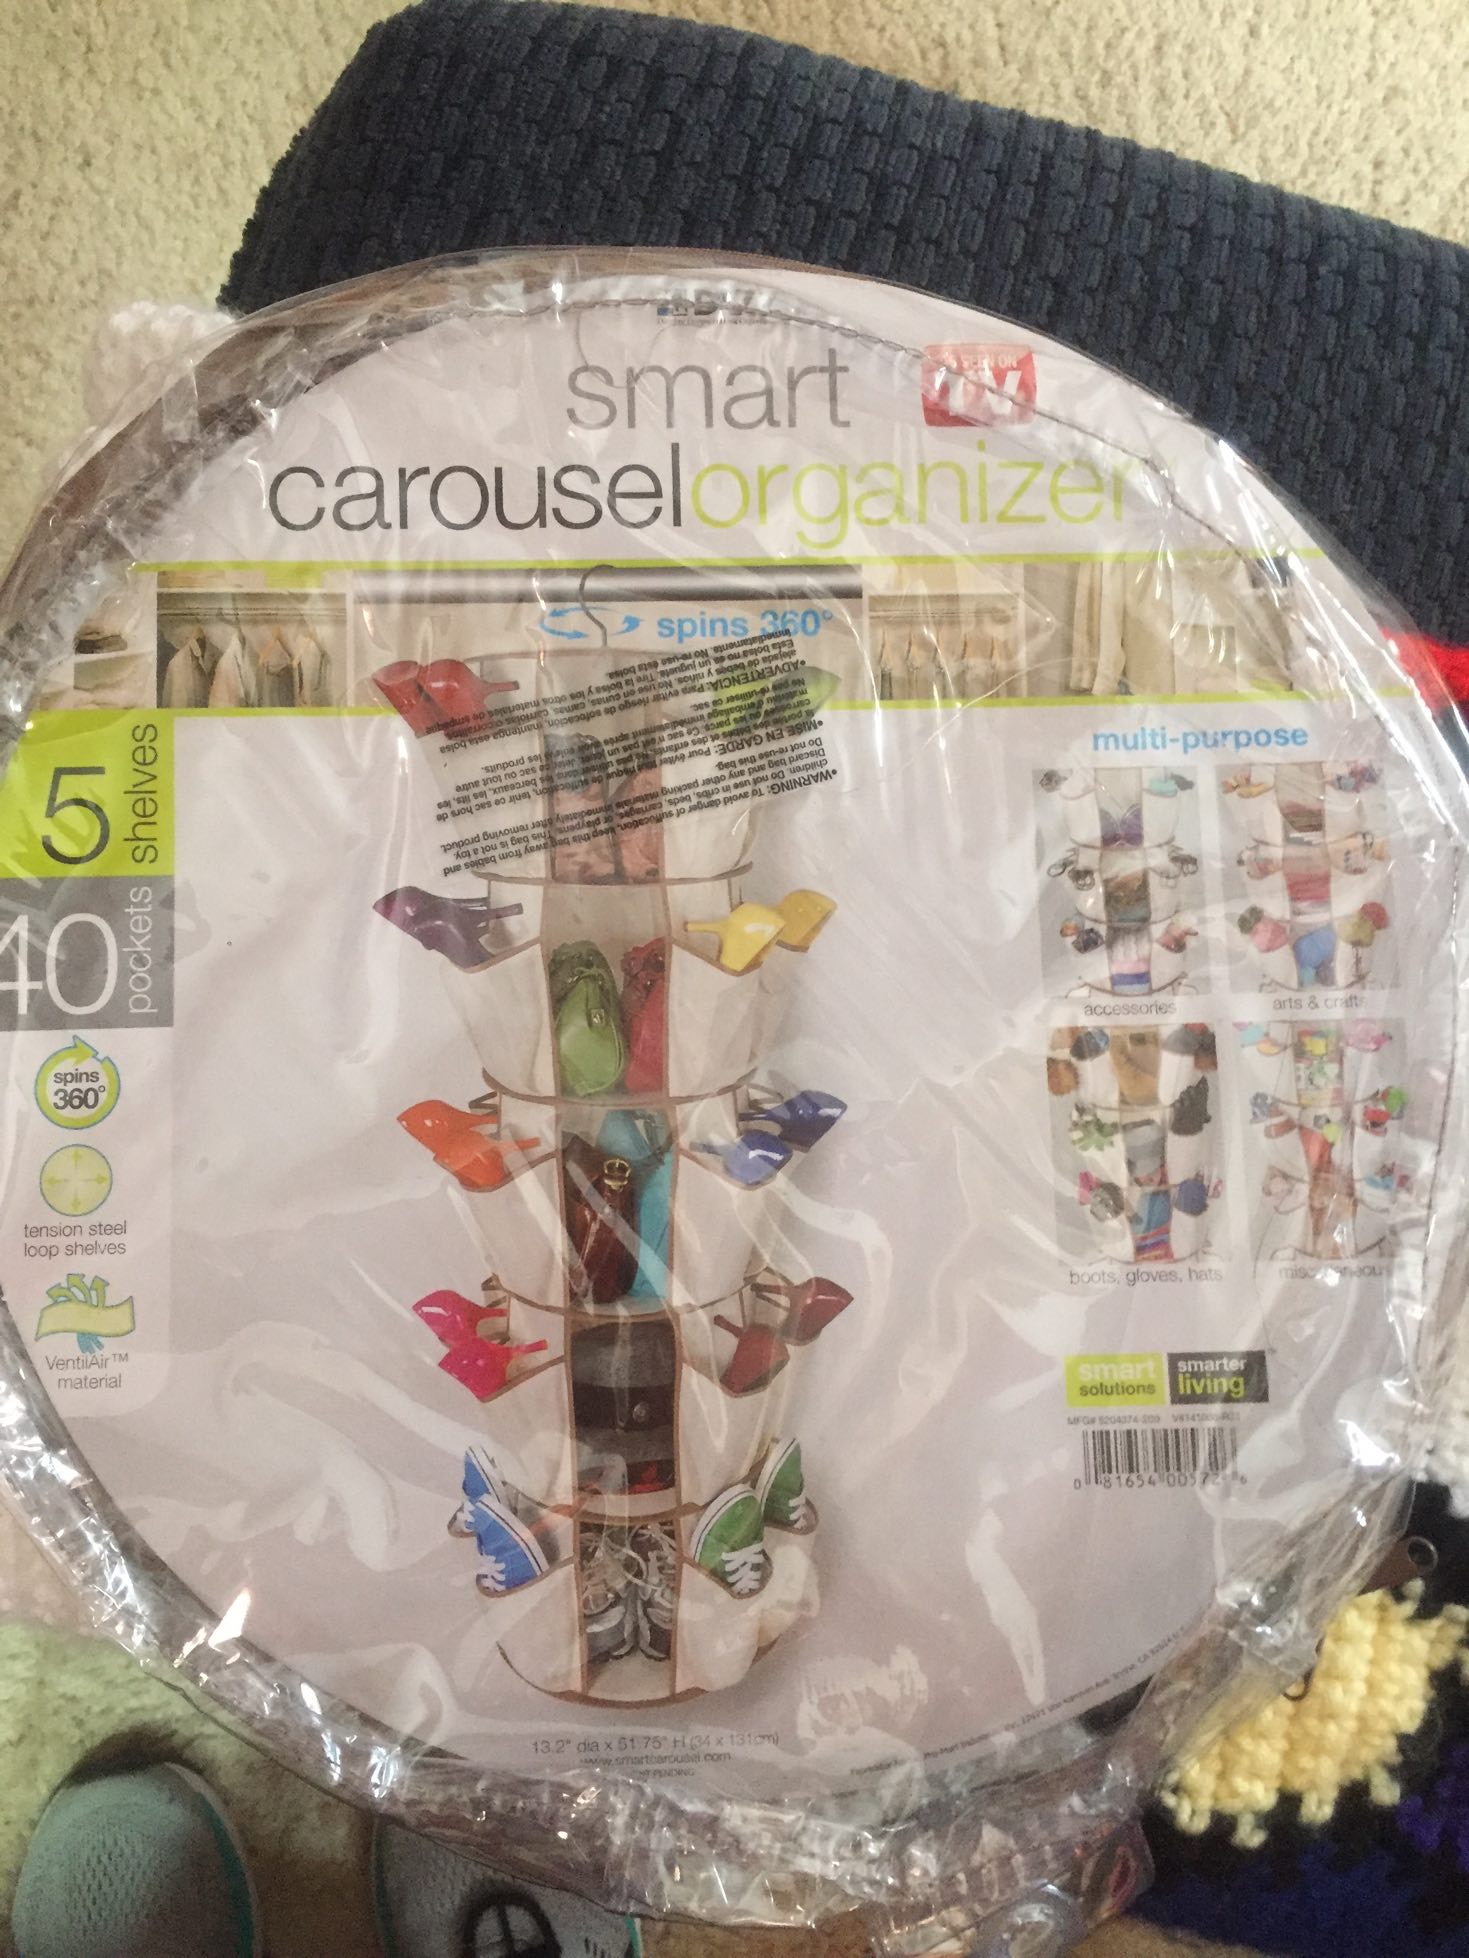
Meanwhile, I was at Walmart, casually walking down an isle and happened to see this smart carrousel. hmmmm…. my thoughts are running! Could I use this to put yarn balls in instead of having small bobbins hanging from the project? It was $11.96 and I grabbed it.
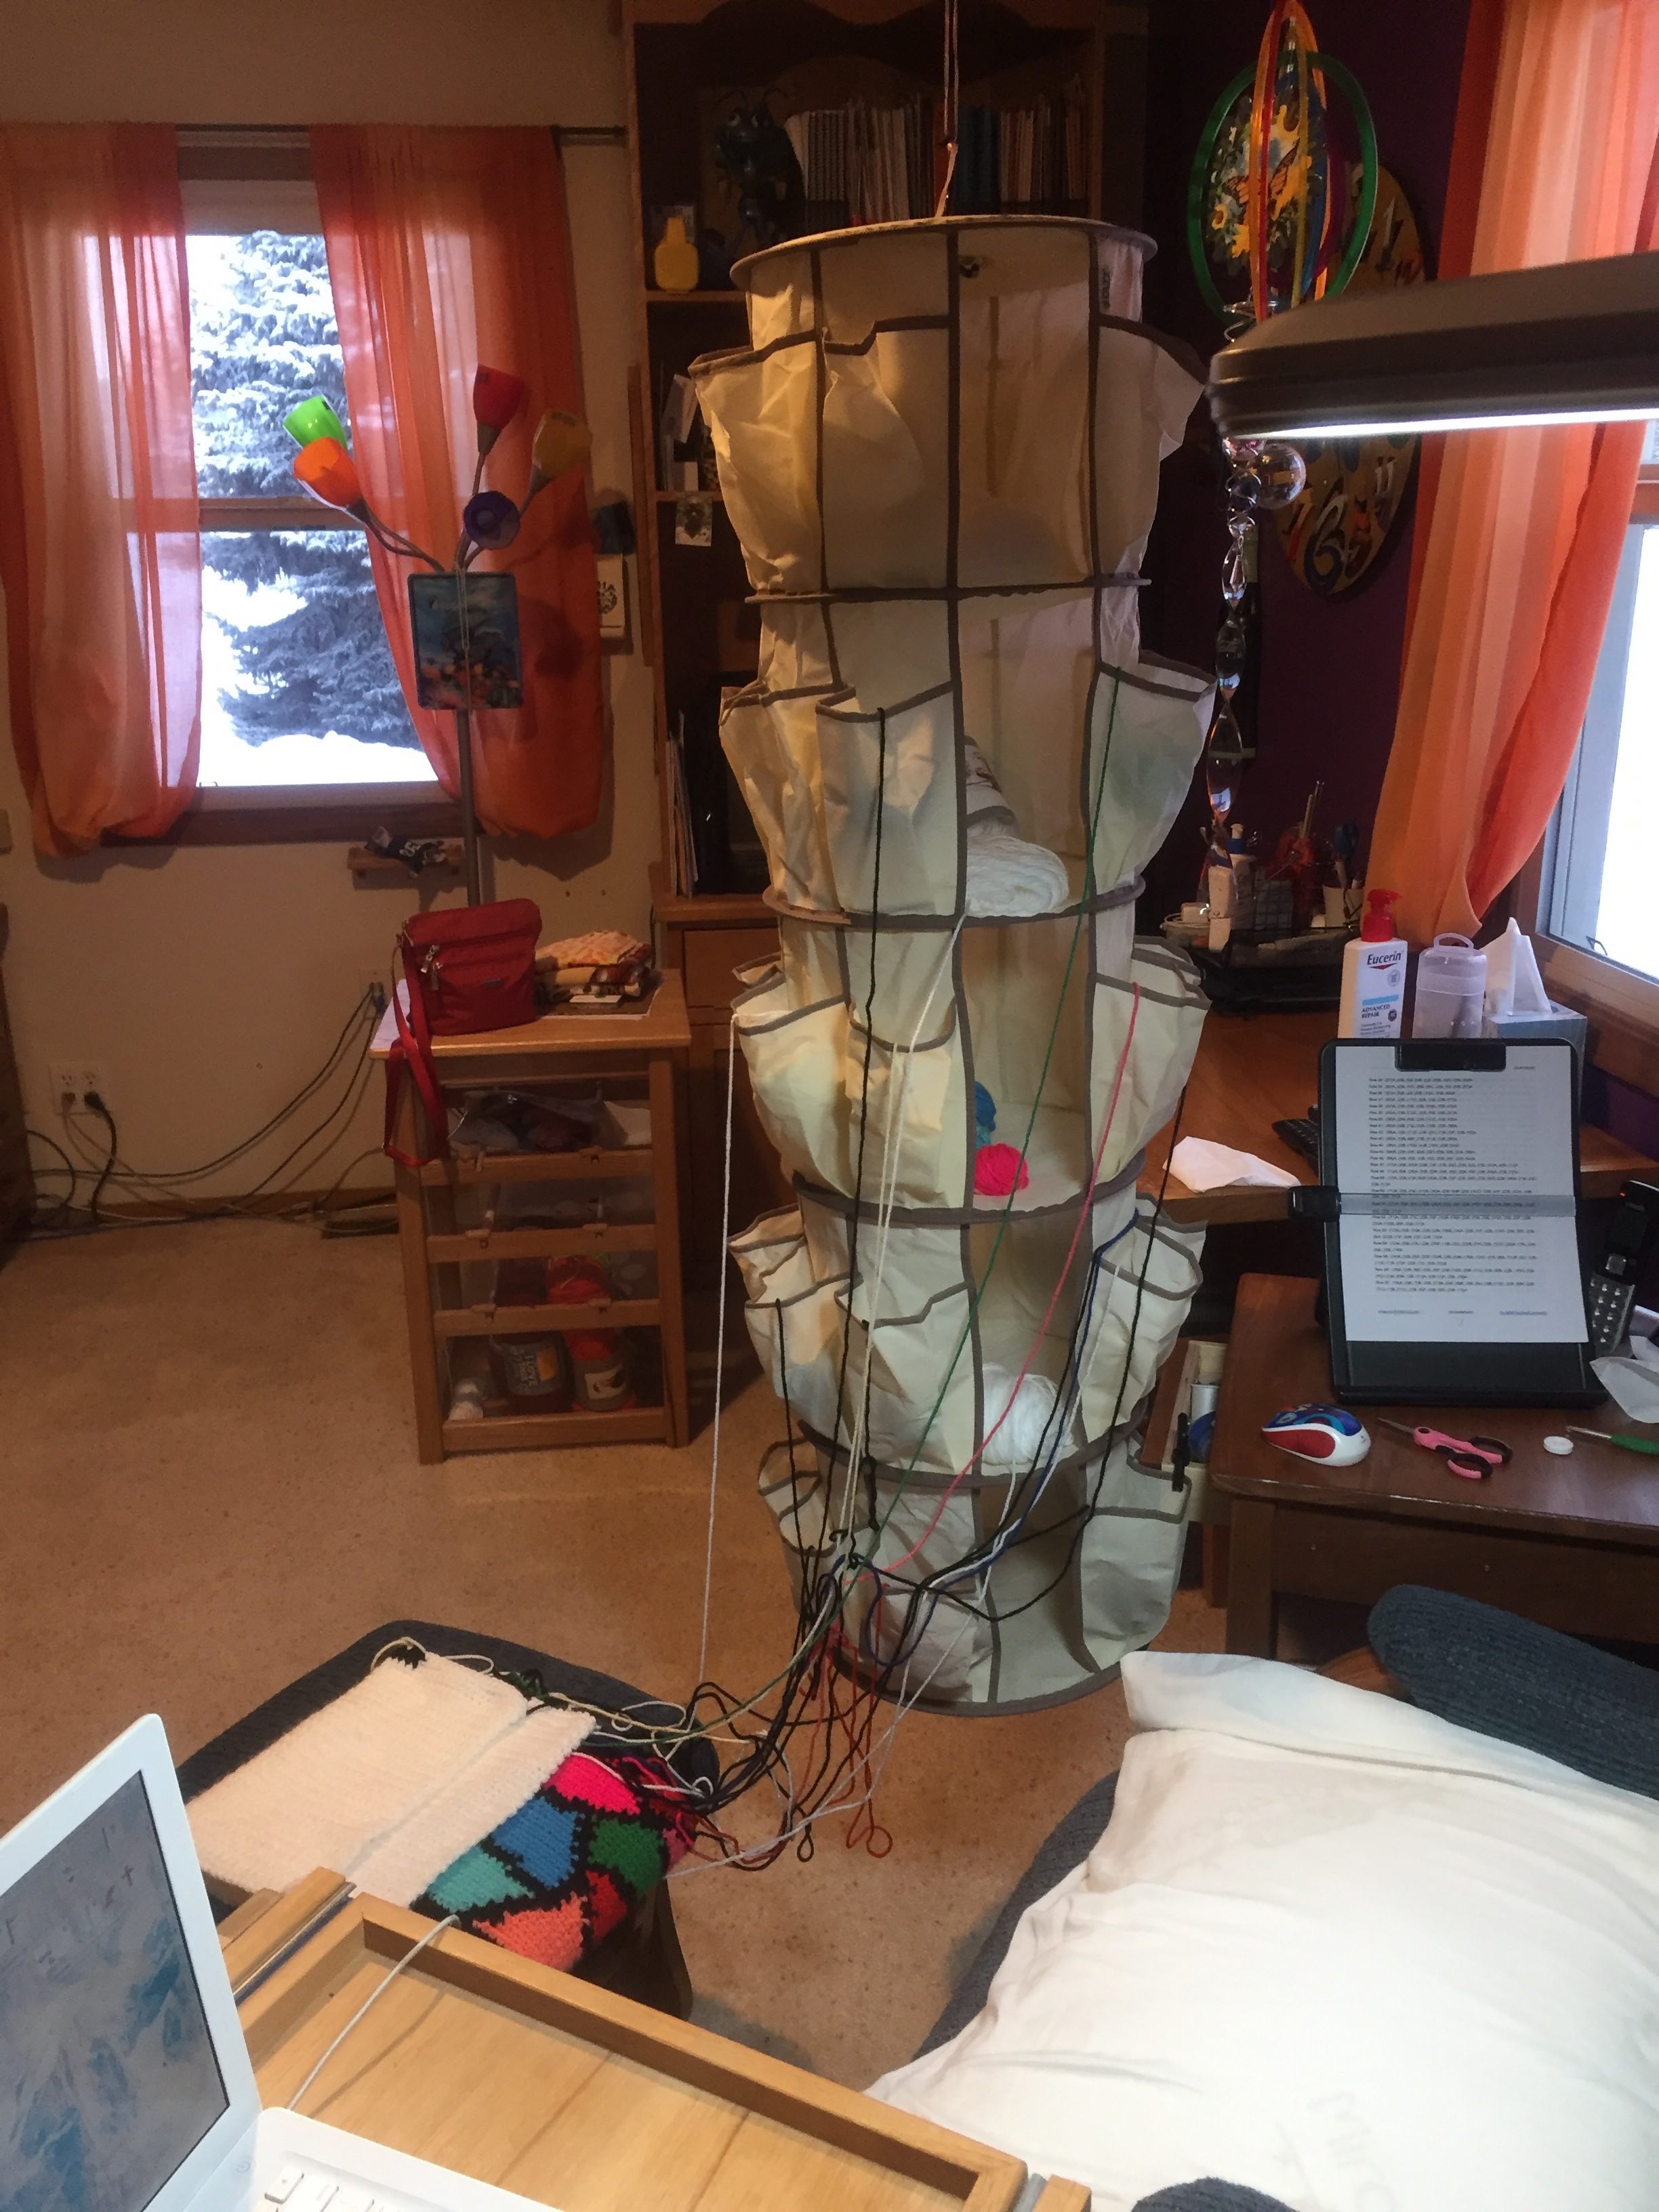
I had my hubby put a hook in the ceiling to the right (and forward a bit) of my chair and used some wire to hang it closer to the floor. I wound balls of yarn about 3 inches in diameter (2 for all colors, except I mades 10 yarn balls of black and 3 yarn balls of white). I had 2 skeins of white, which I put in the center shelves of the carousel.
Now to strategically place your different yarn balls when you begin the colors. All colors from the center to the right, I put the yarn balls on the right of the shelves on the carousel. For all colors from the center to the left, I put those in the pockets to the left of the shelves on the carousel.
When I finish a row, I flip the project over and now your yarn is crossed. (don’t panic… it will right itself when you flip the project over the reverse when the row is complete.
When a color is complete, I immediately clip it, leave a tail to weave in with tapestry needle, and put the ball back on one of the shelves for later use.
Sure, every now and then, especially after adding new colors, you will have to untangle a couple, but it is no where near the time you spend untangling the bobbins! Been there, done that!
To keep things from tangling too much, when I added a new color, I’d check to see which side of the carrousel the yarn next to it was on, and put the new color yarn ball on the same side.
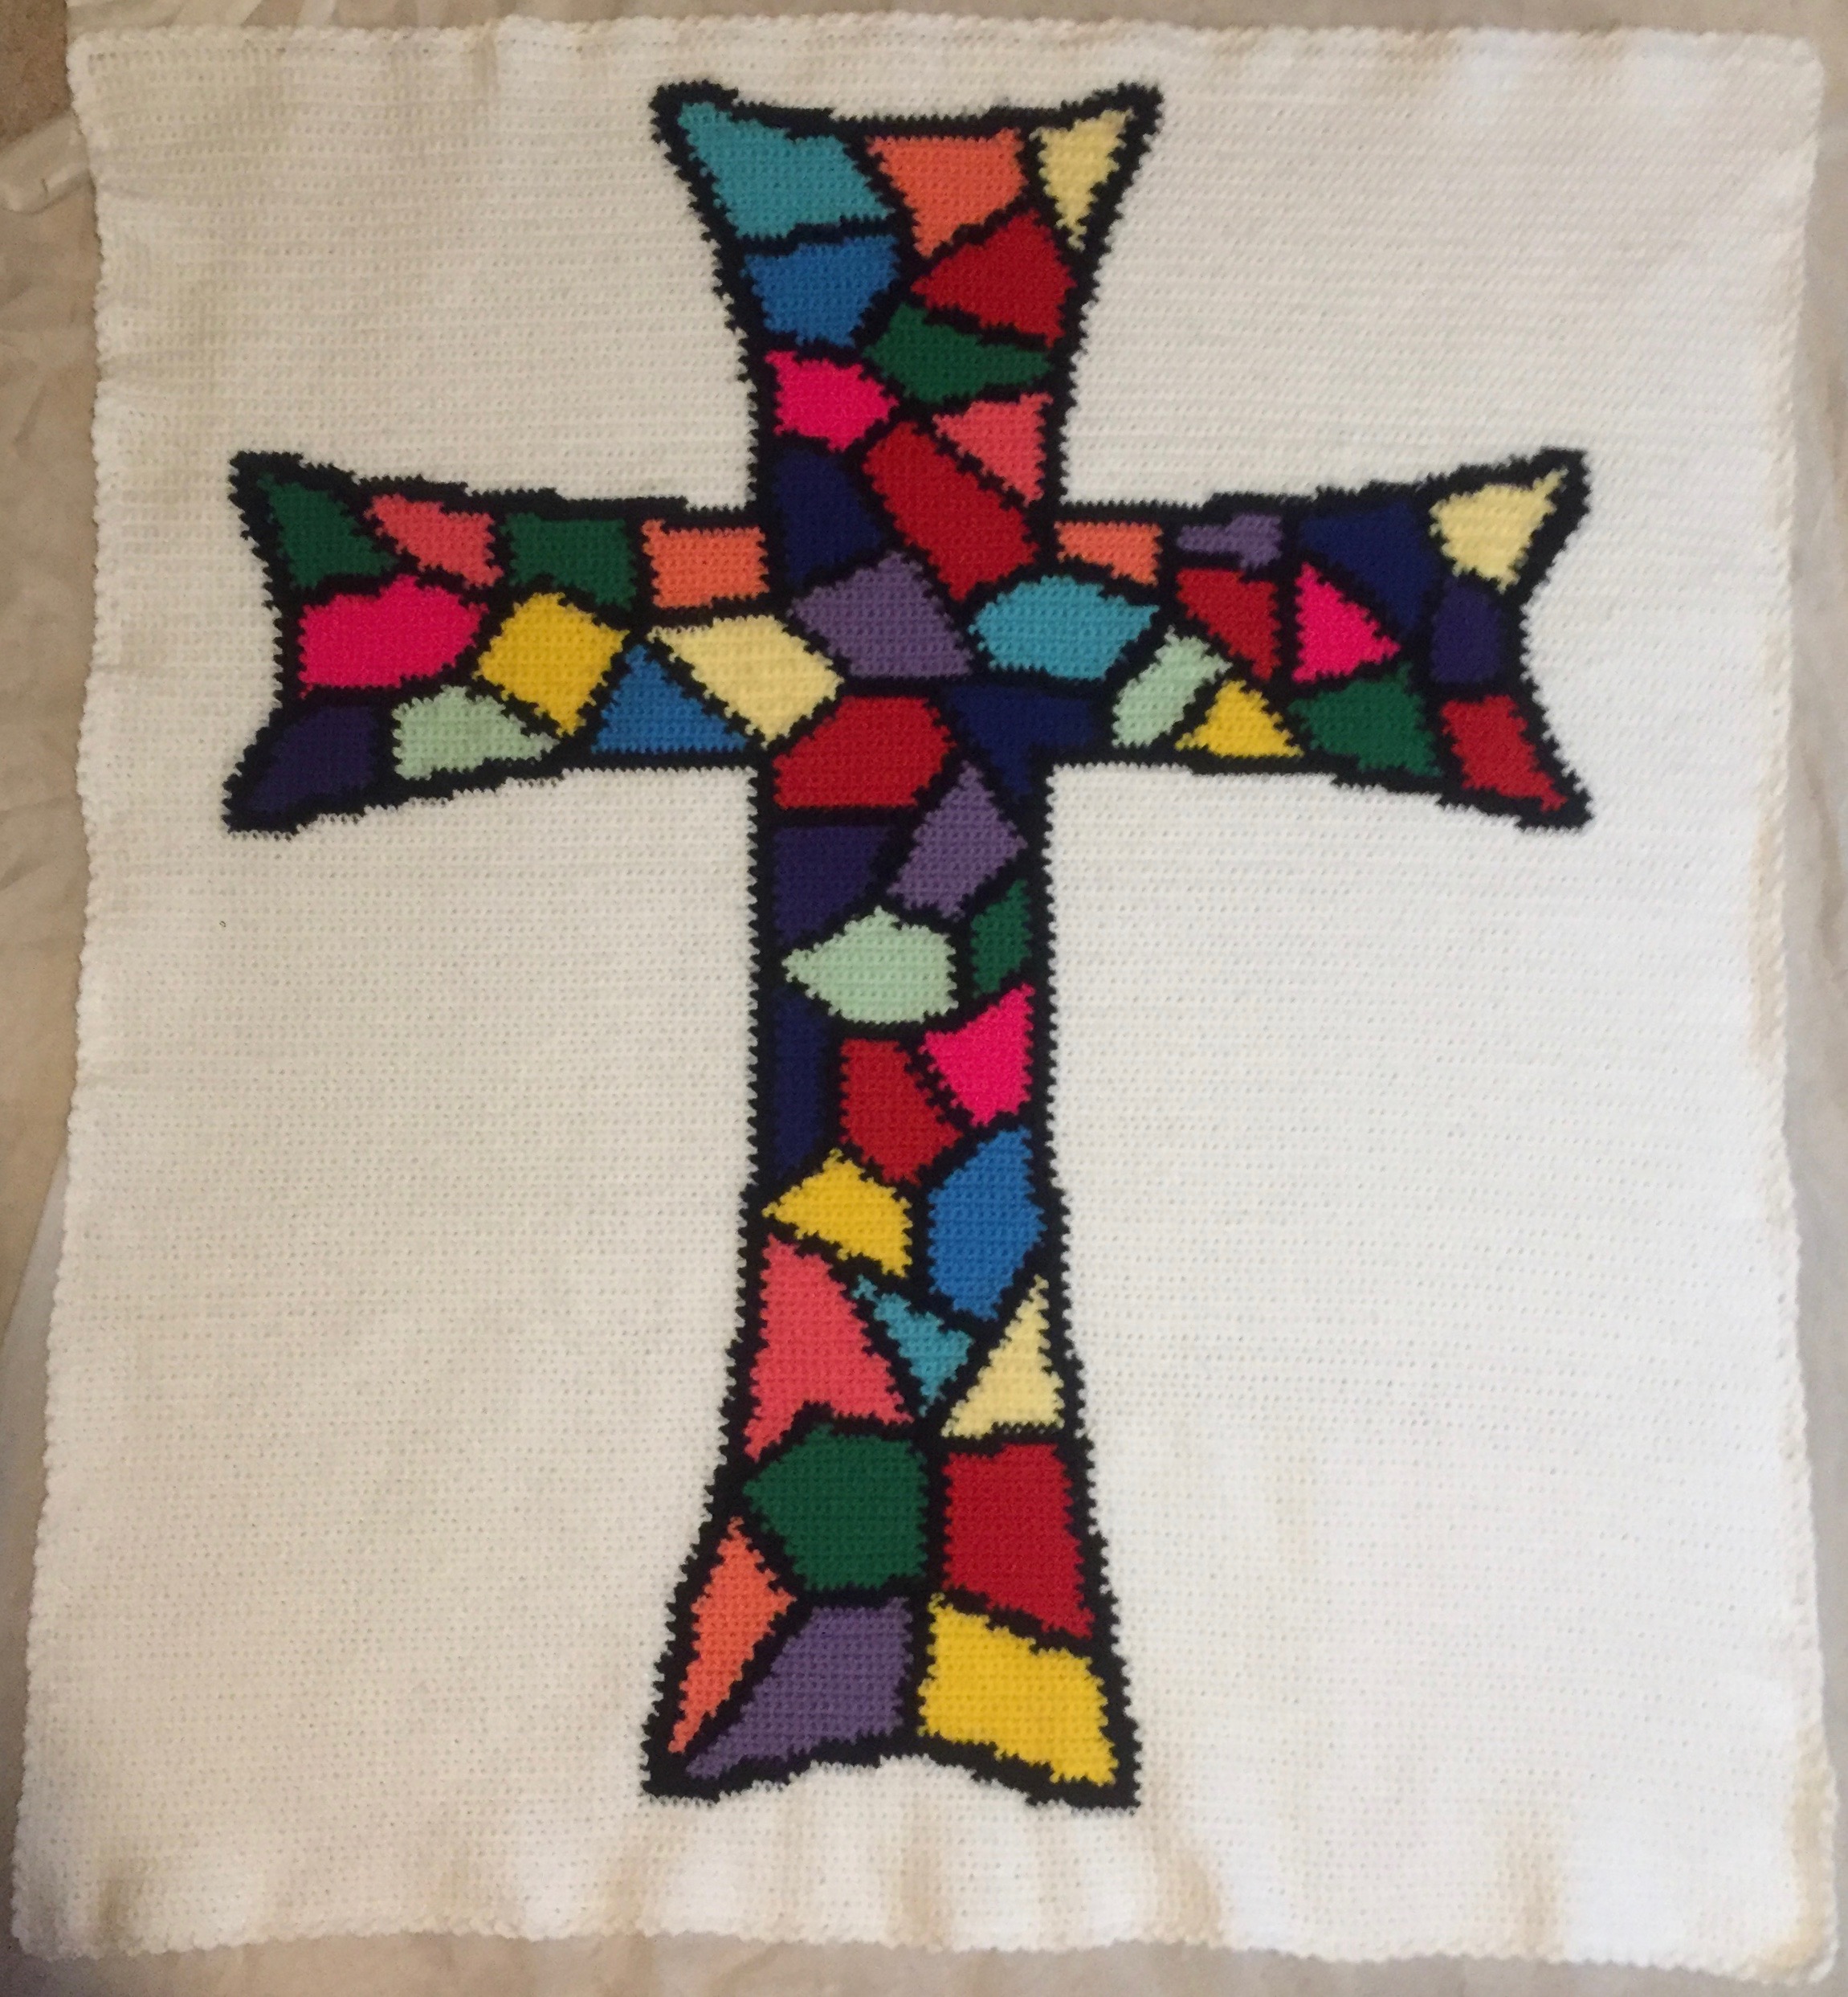
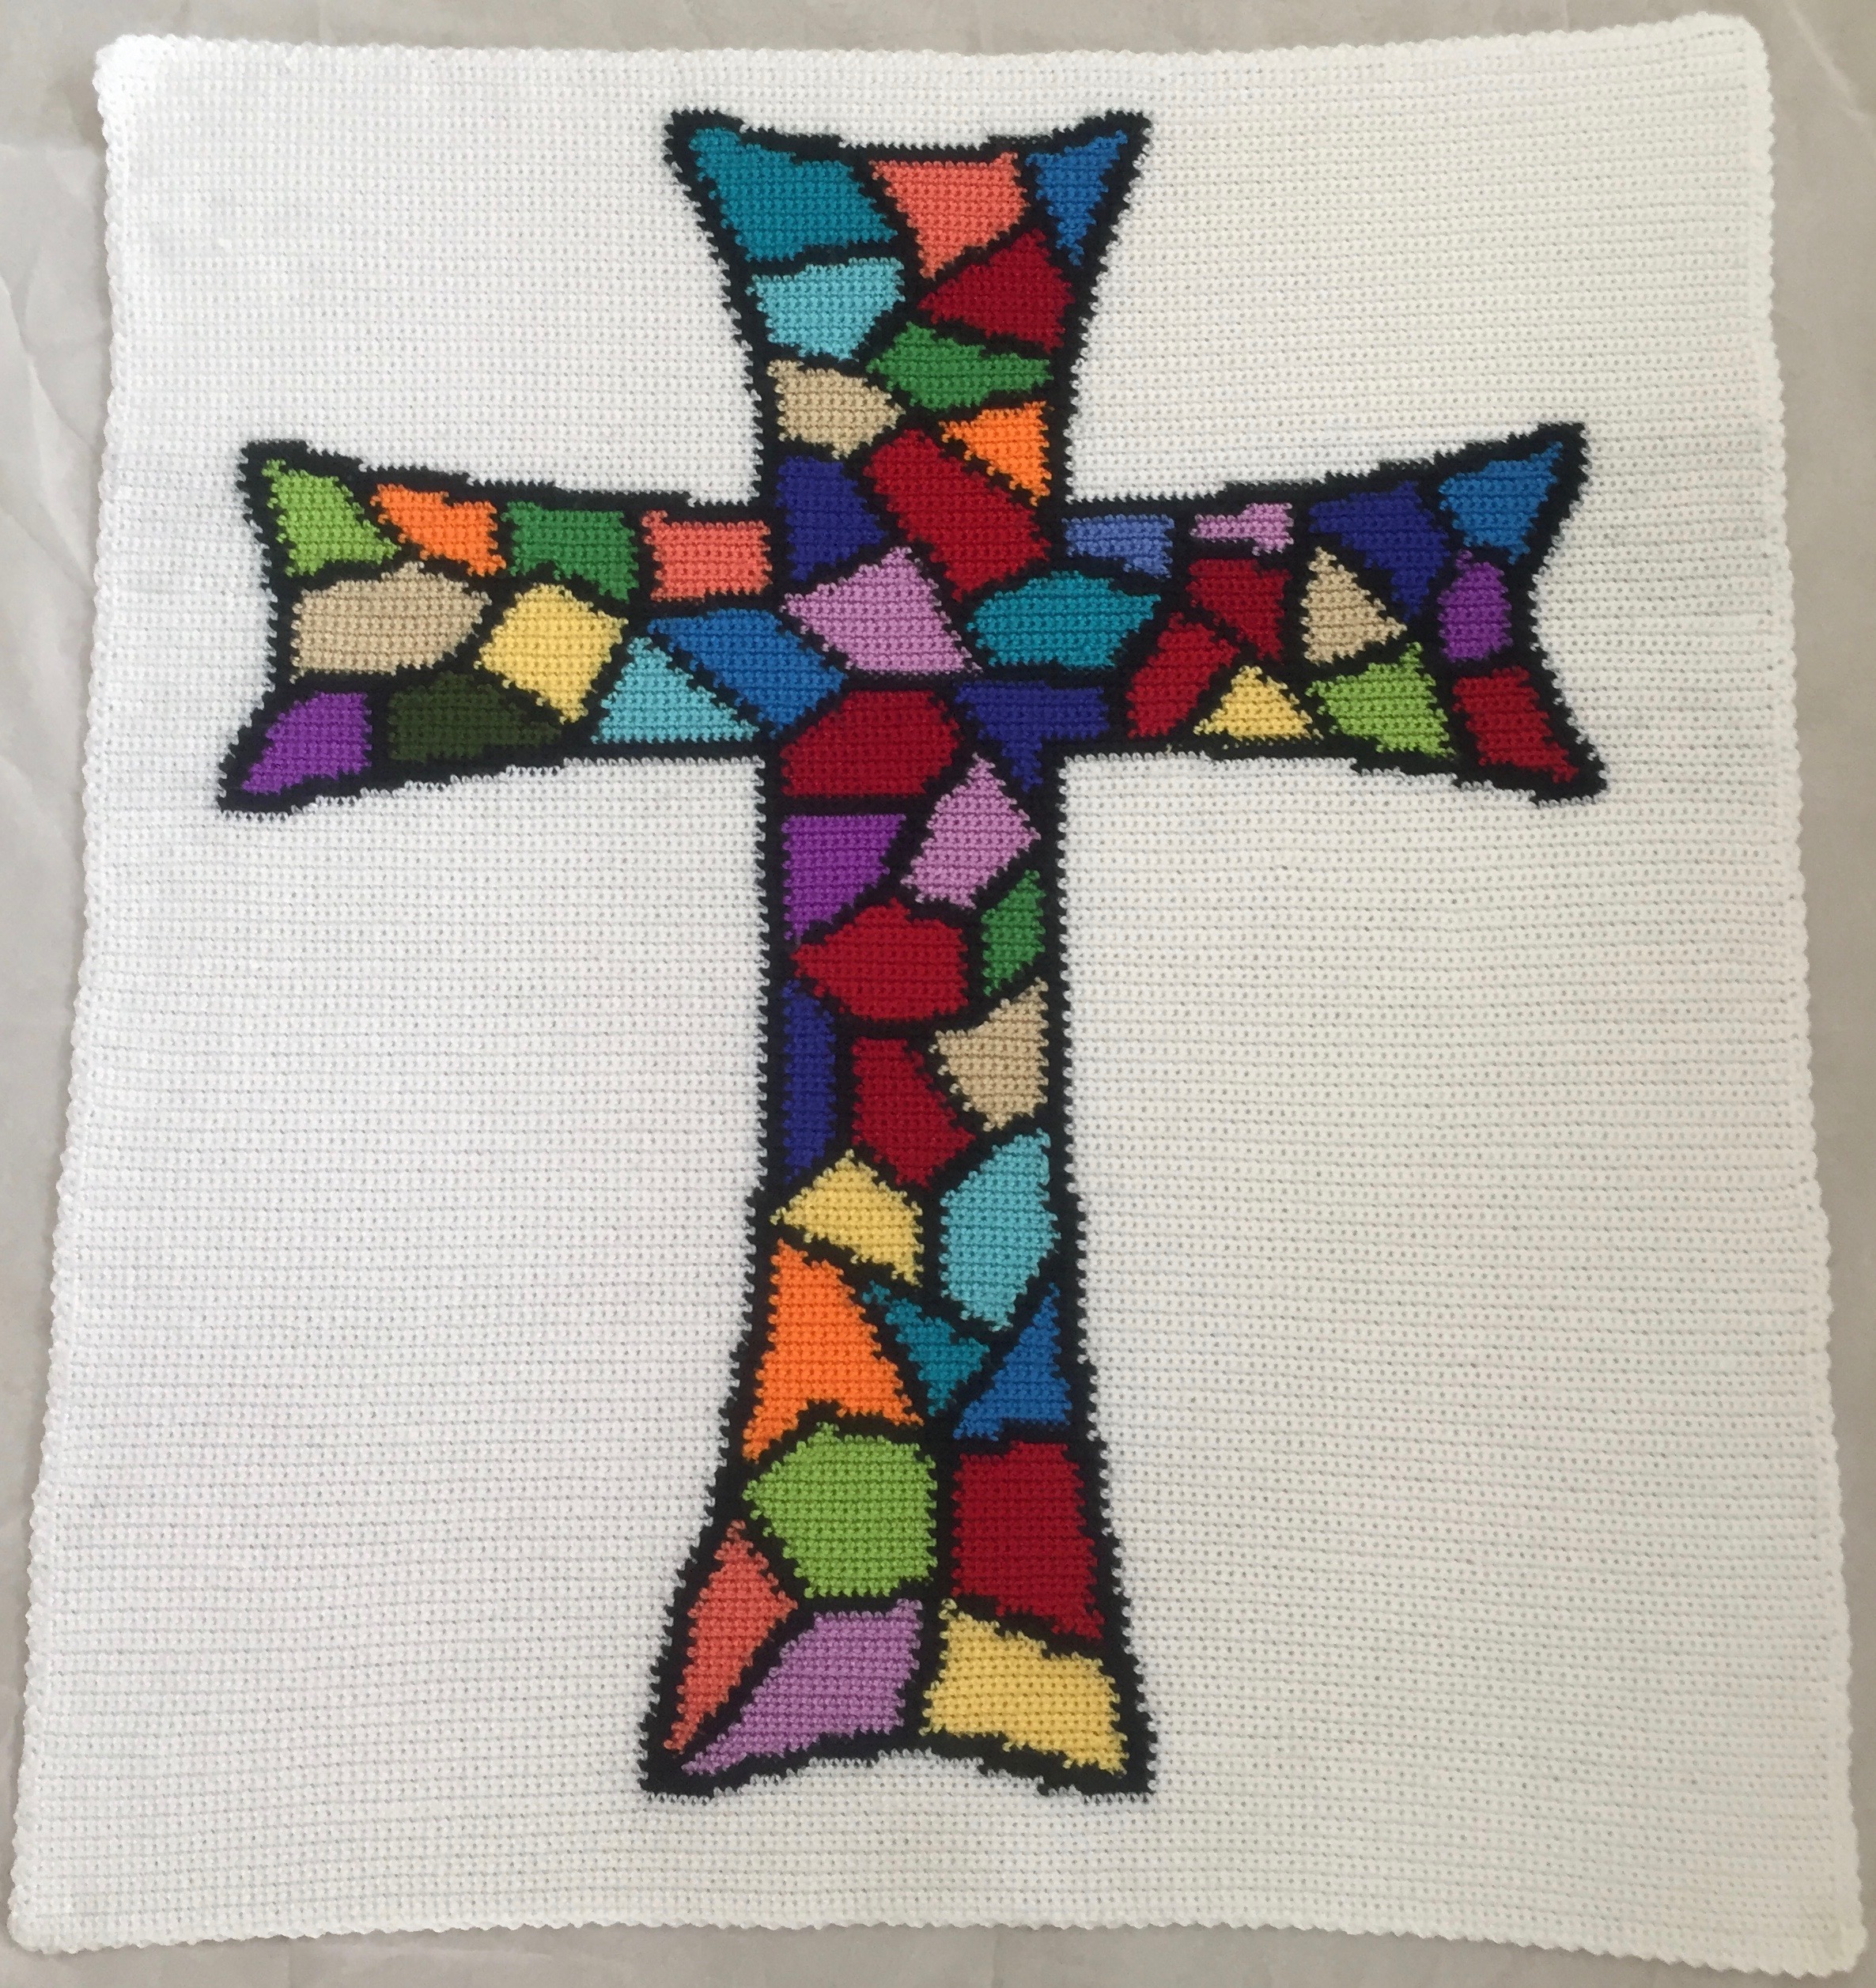
My first finished stained glass cross project: (It is much whiter, but picture was taken at night.)
Well, I tried it again, but used Caron Simply Soft AND YarnBee Soft Secret. I loved the shininess of the YarnBee. I also chose to use the colors (as close as I could match them) to the precious stones in Revelation 21:18-21. Naturally there are different colors of Jasper, Topaz, Jacinth, etc. so I did the best I could. I also didn’t want variegated yarn for agate, so used a biscuit color. Here is my 2nd cross project. I now have the tension correct, I weaved the tails in about every 10 rows, and all was well EXCEPT the fuzz from the YarnBee black carried on to the white when crocheting on the long part of the cross. You can easily see it on the right. That was very upsetting!
I do not give up easily so now I’m trying a new yarn, Premier Everyday Soft Yarn Anti-Pilling. (It arrives tomorrow!) I hope this does not have fuzz that carries through to the white. If it does, I’m going to do it in “I Love This Yarn” again, but in the colors of the precious stones, and a couple extra colors. For each different yarn I have created a chart with the yarn colors that equal A, B, C, D, etc. on up to N. I used 2 colors for C, since I wanted to use Chrysolite (Lime Green) and Emerald (Jelly Belly in I Love This Yarn). If anyone is interested in the charts, let me know.
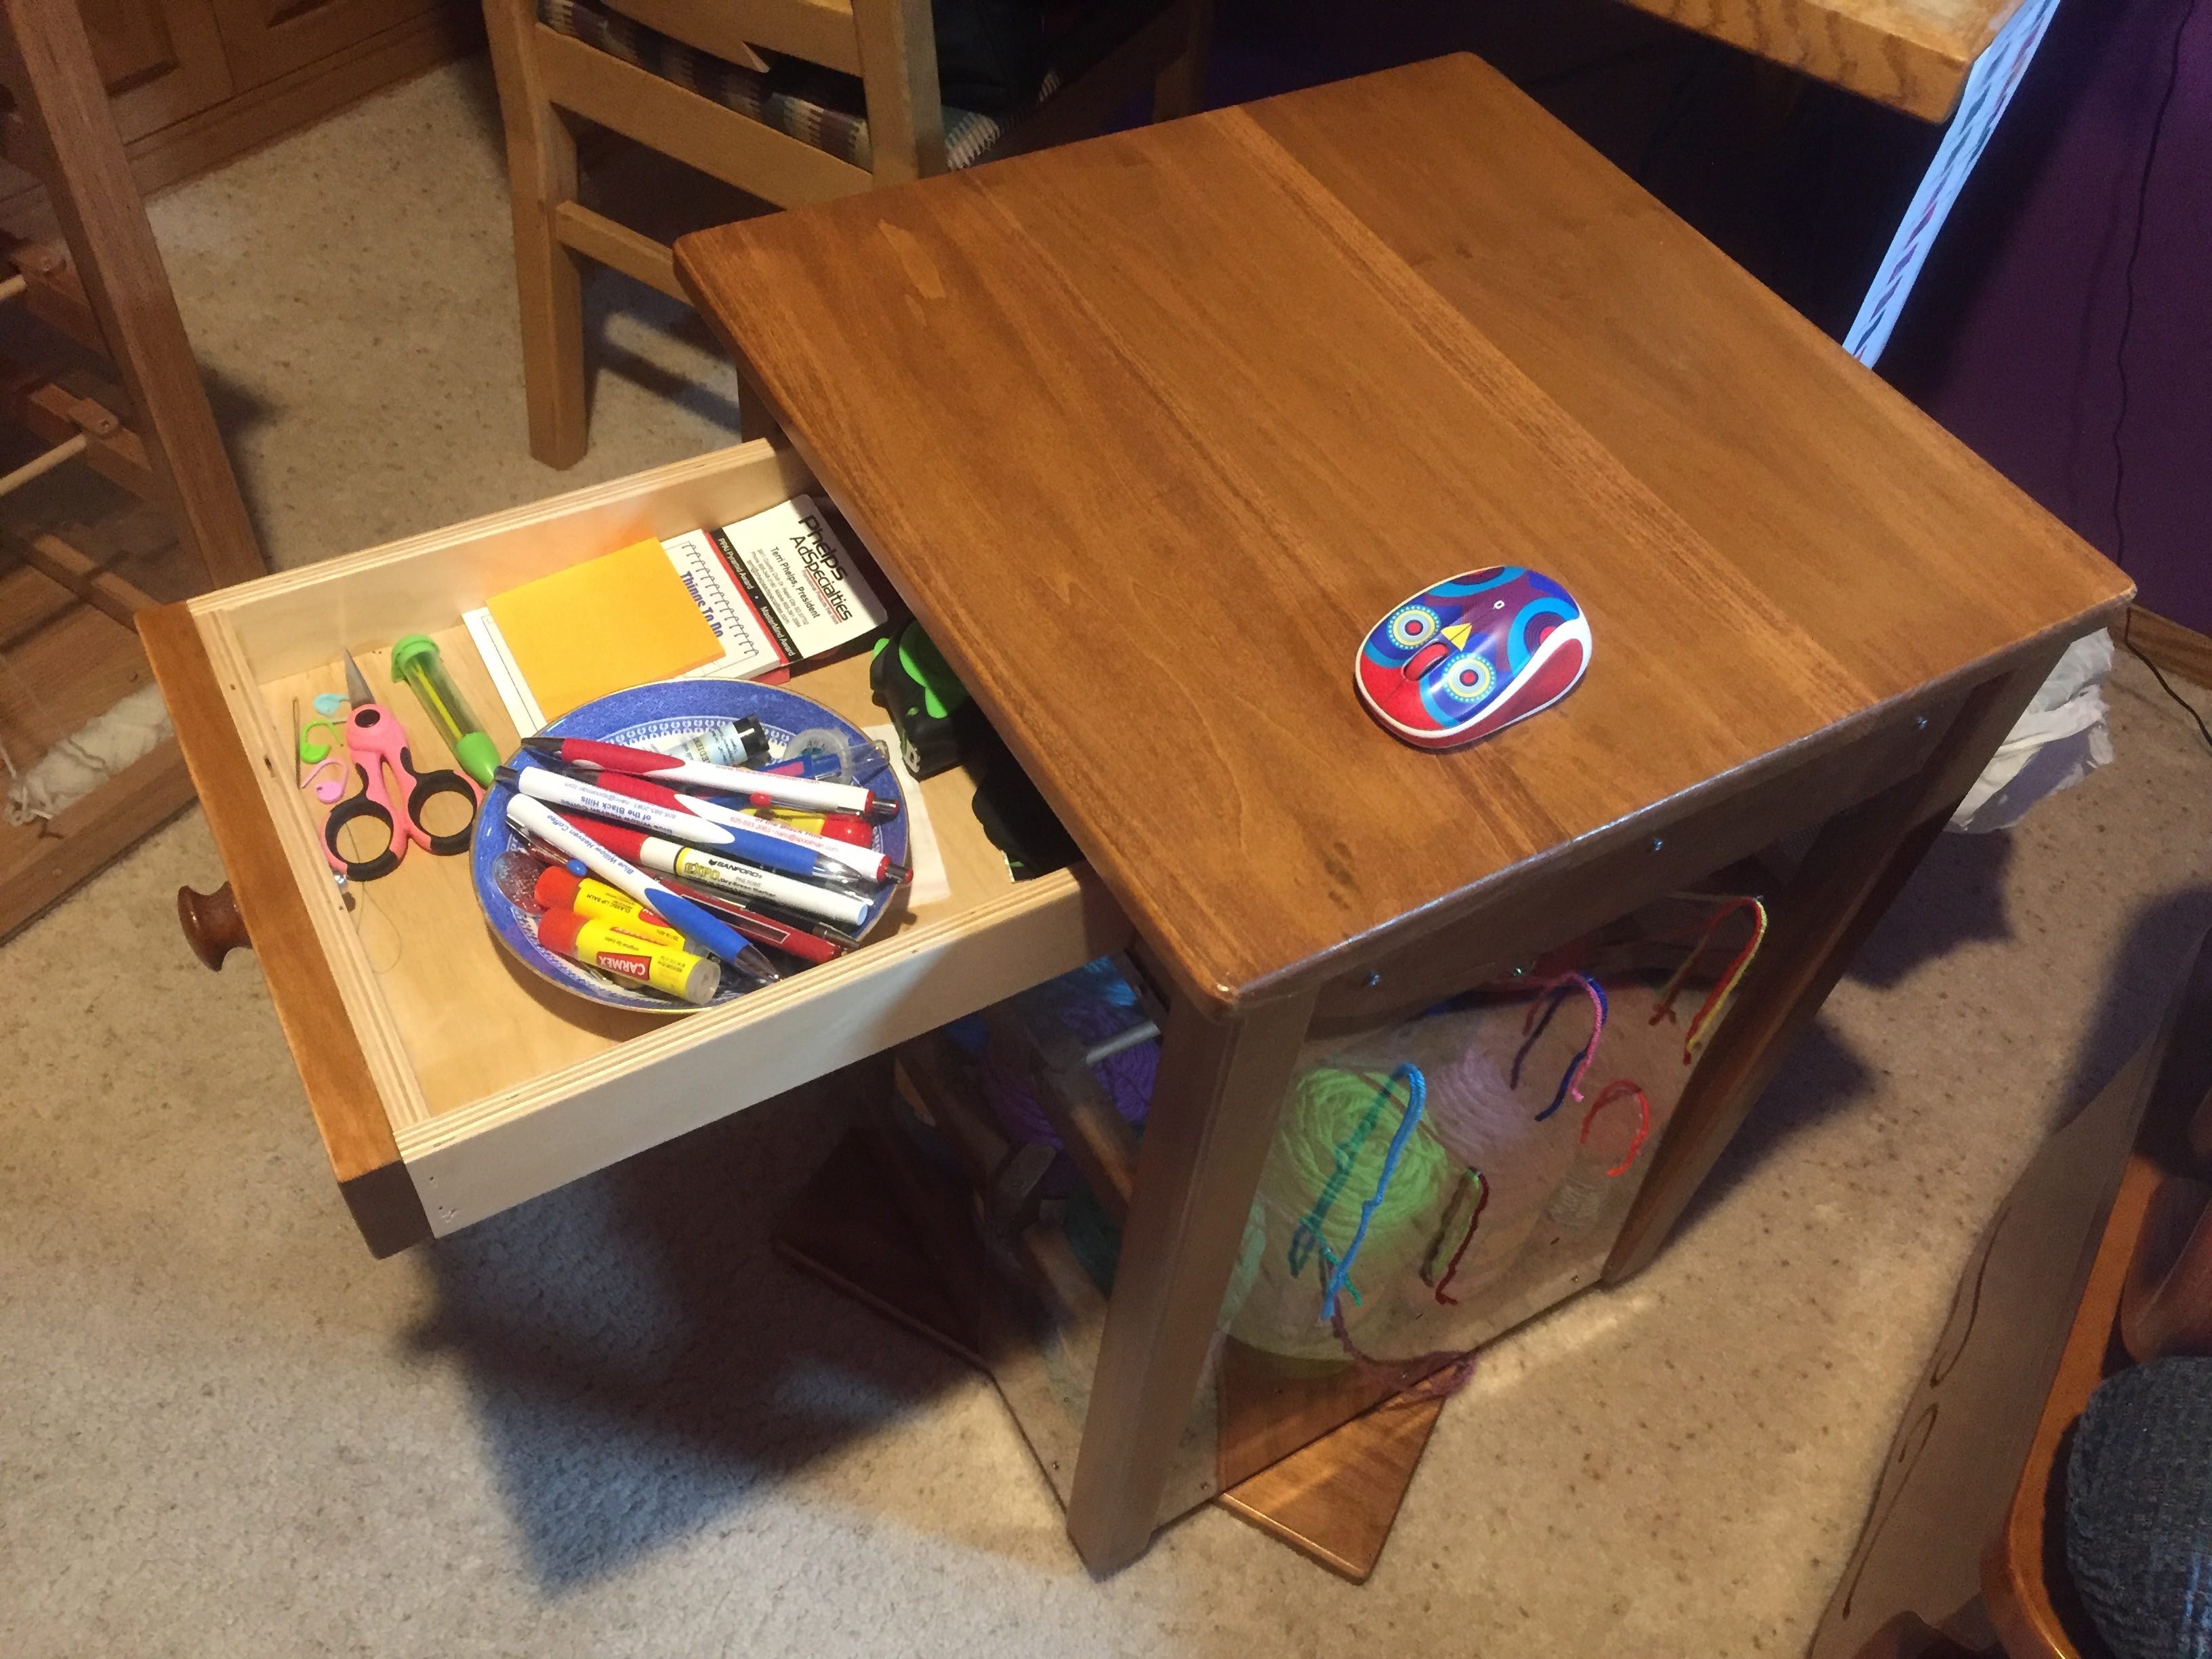
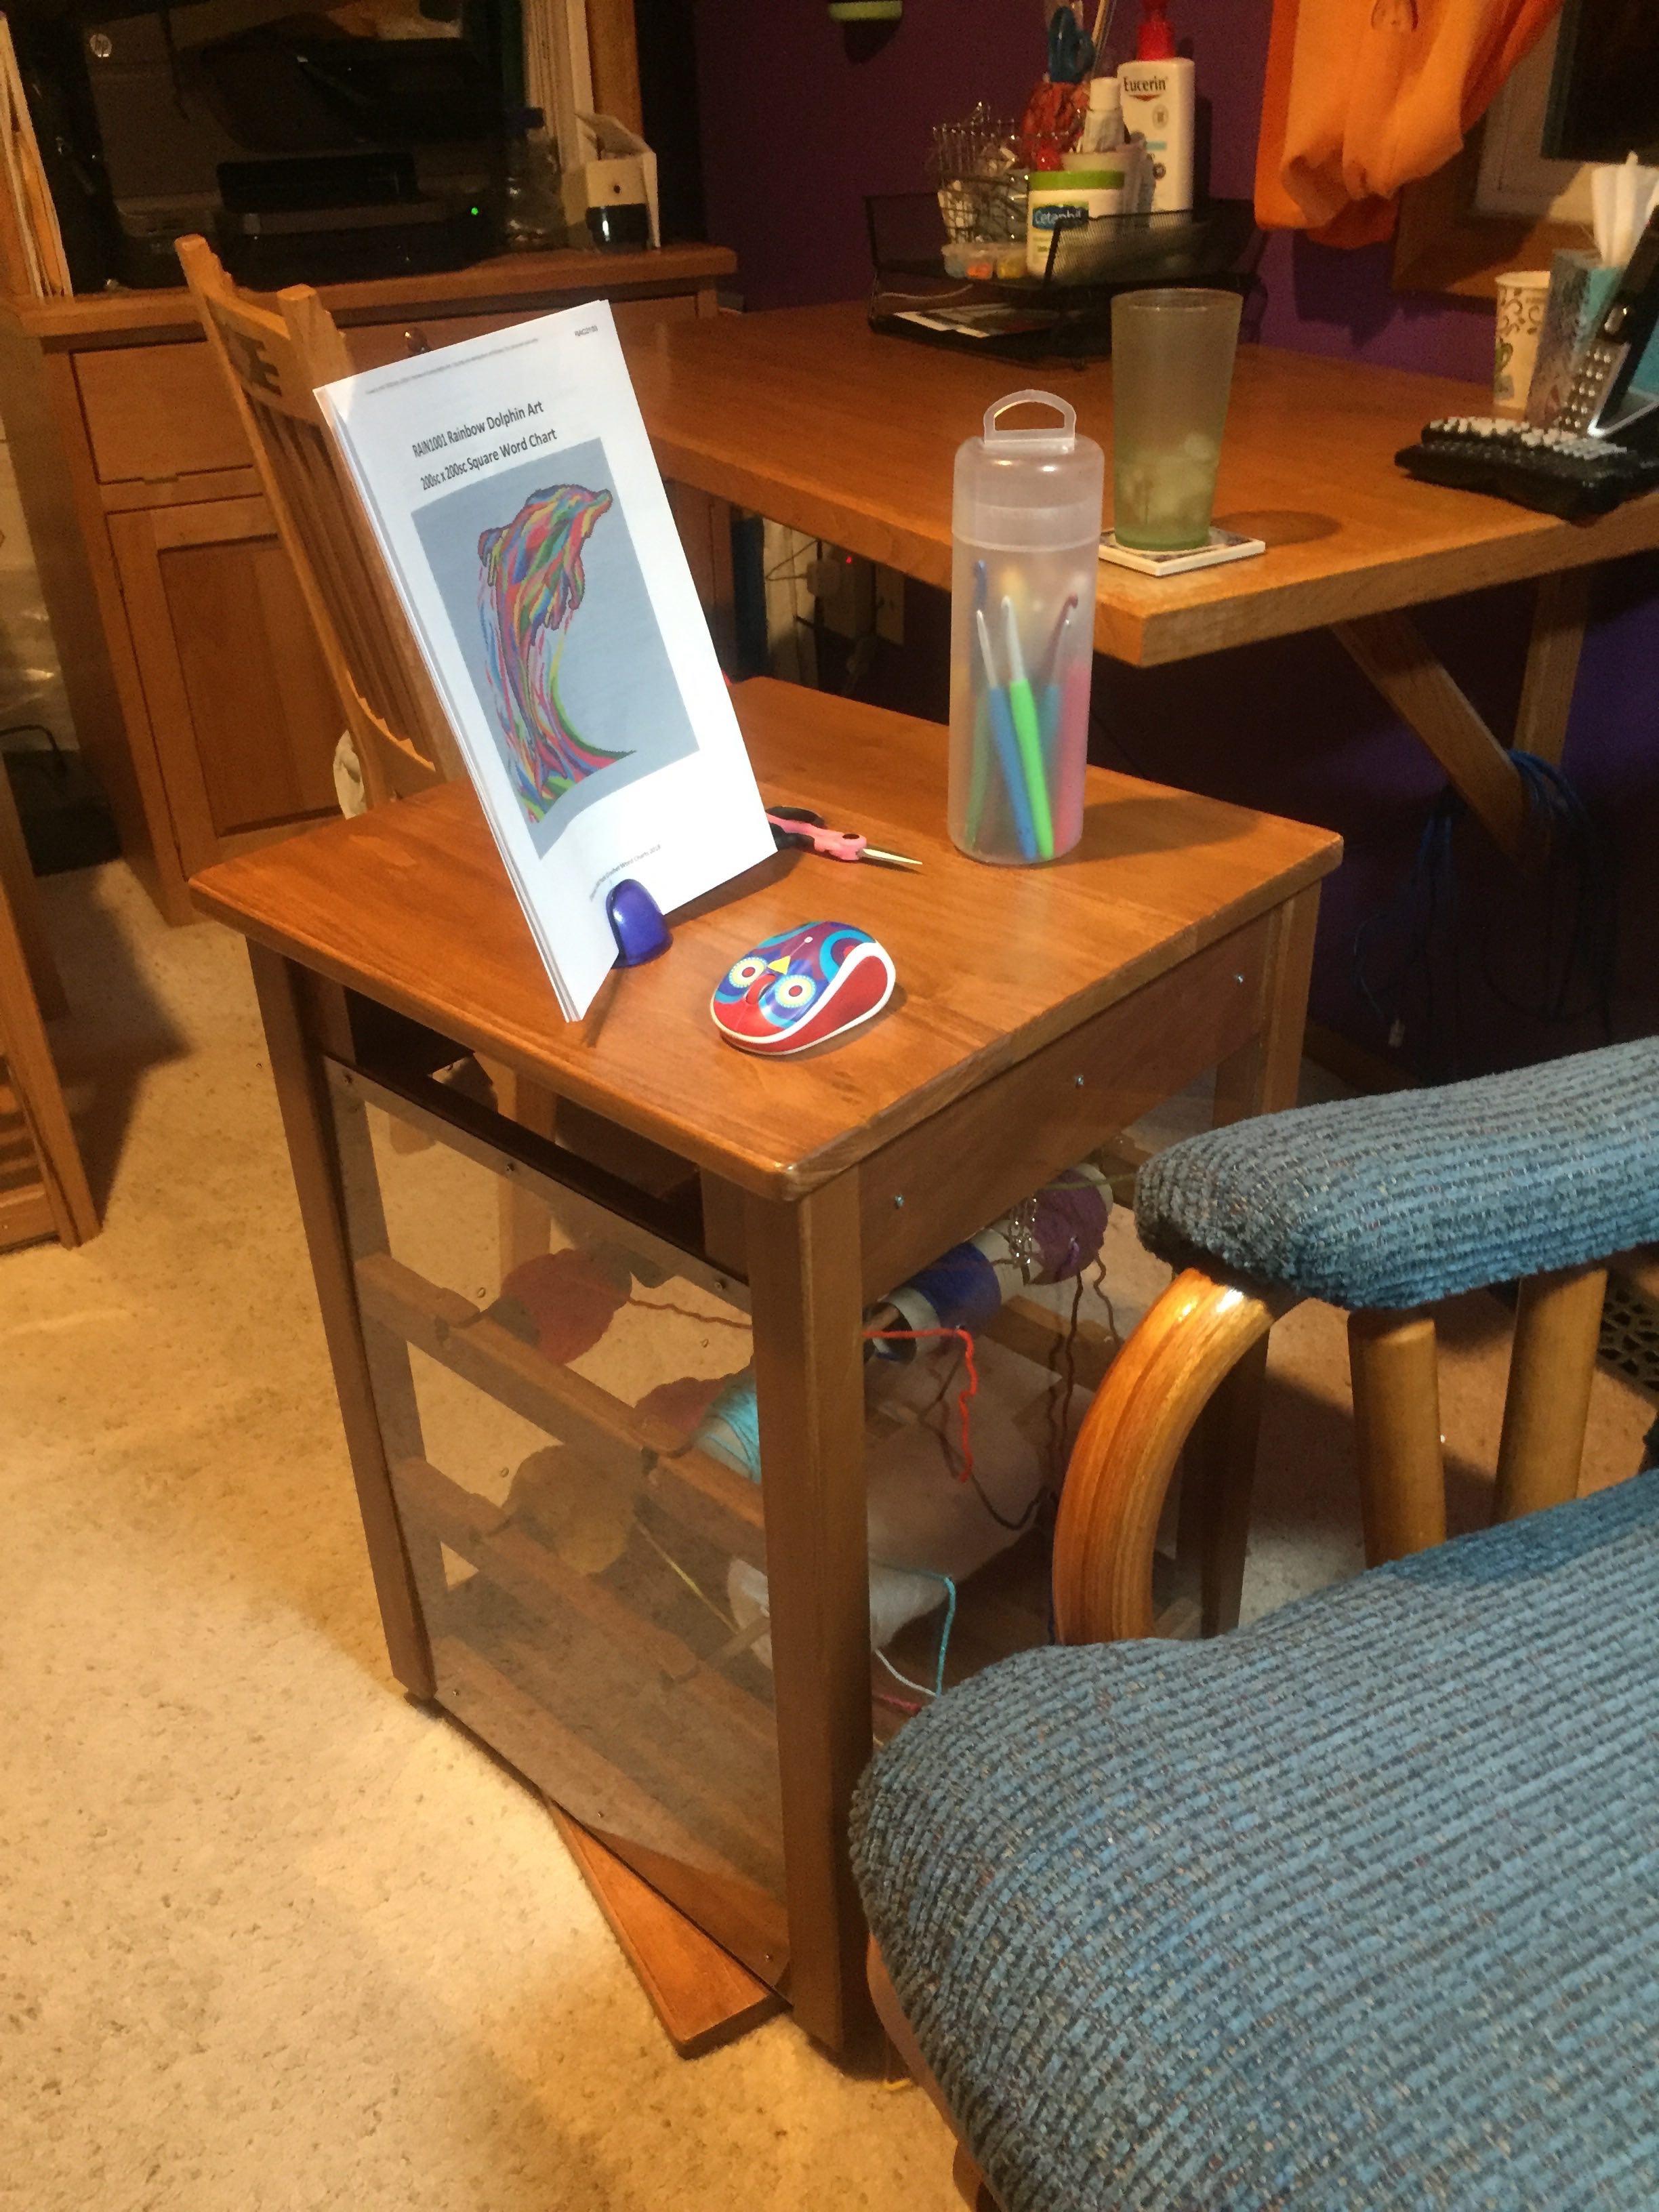
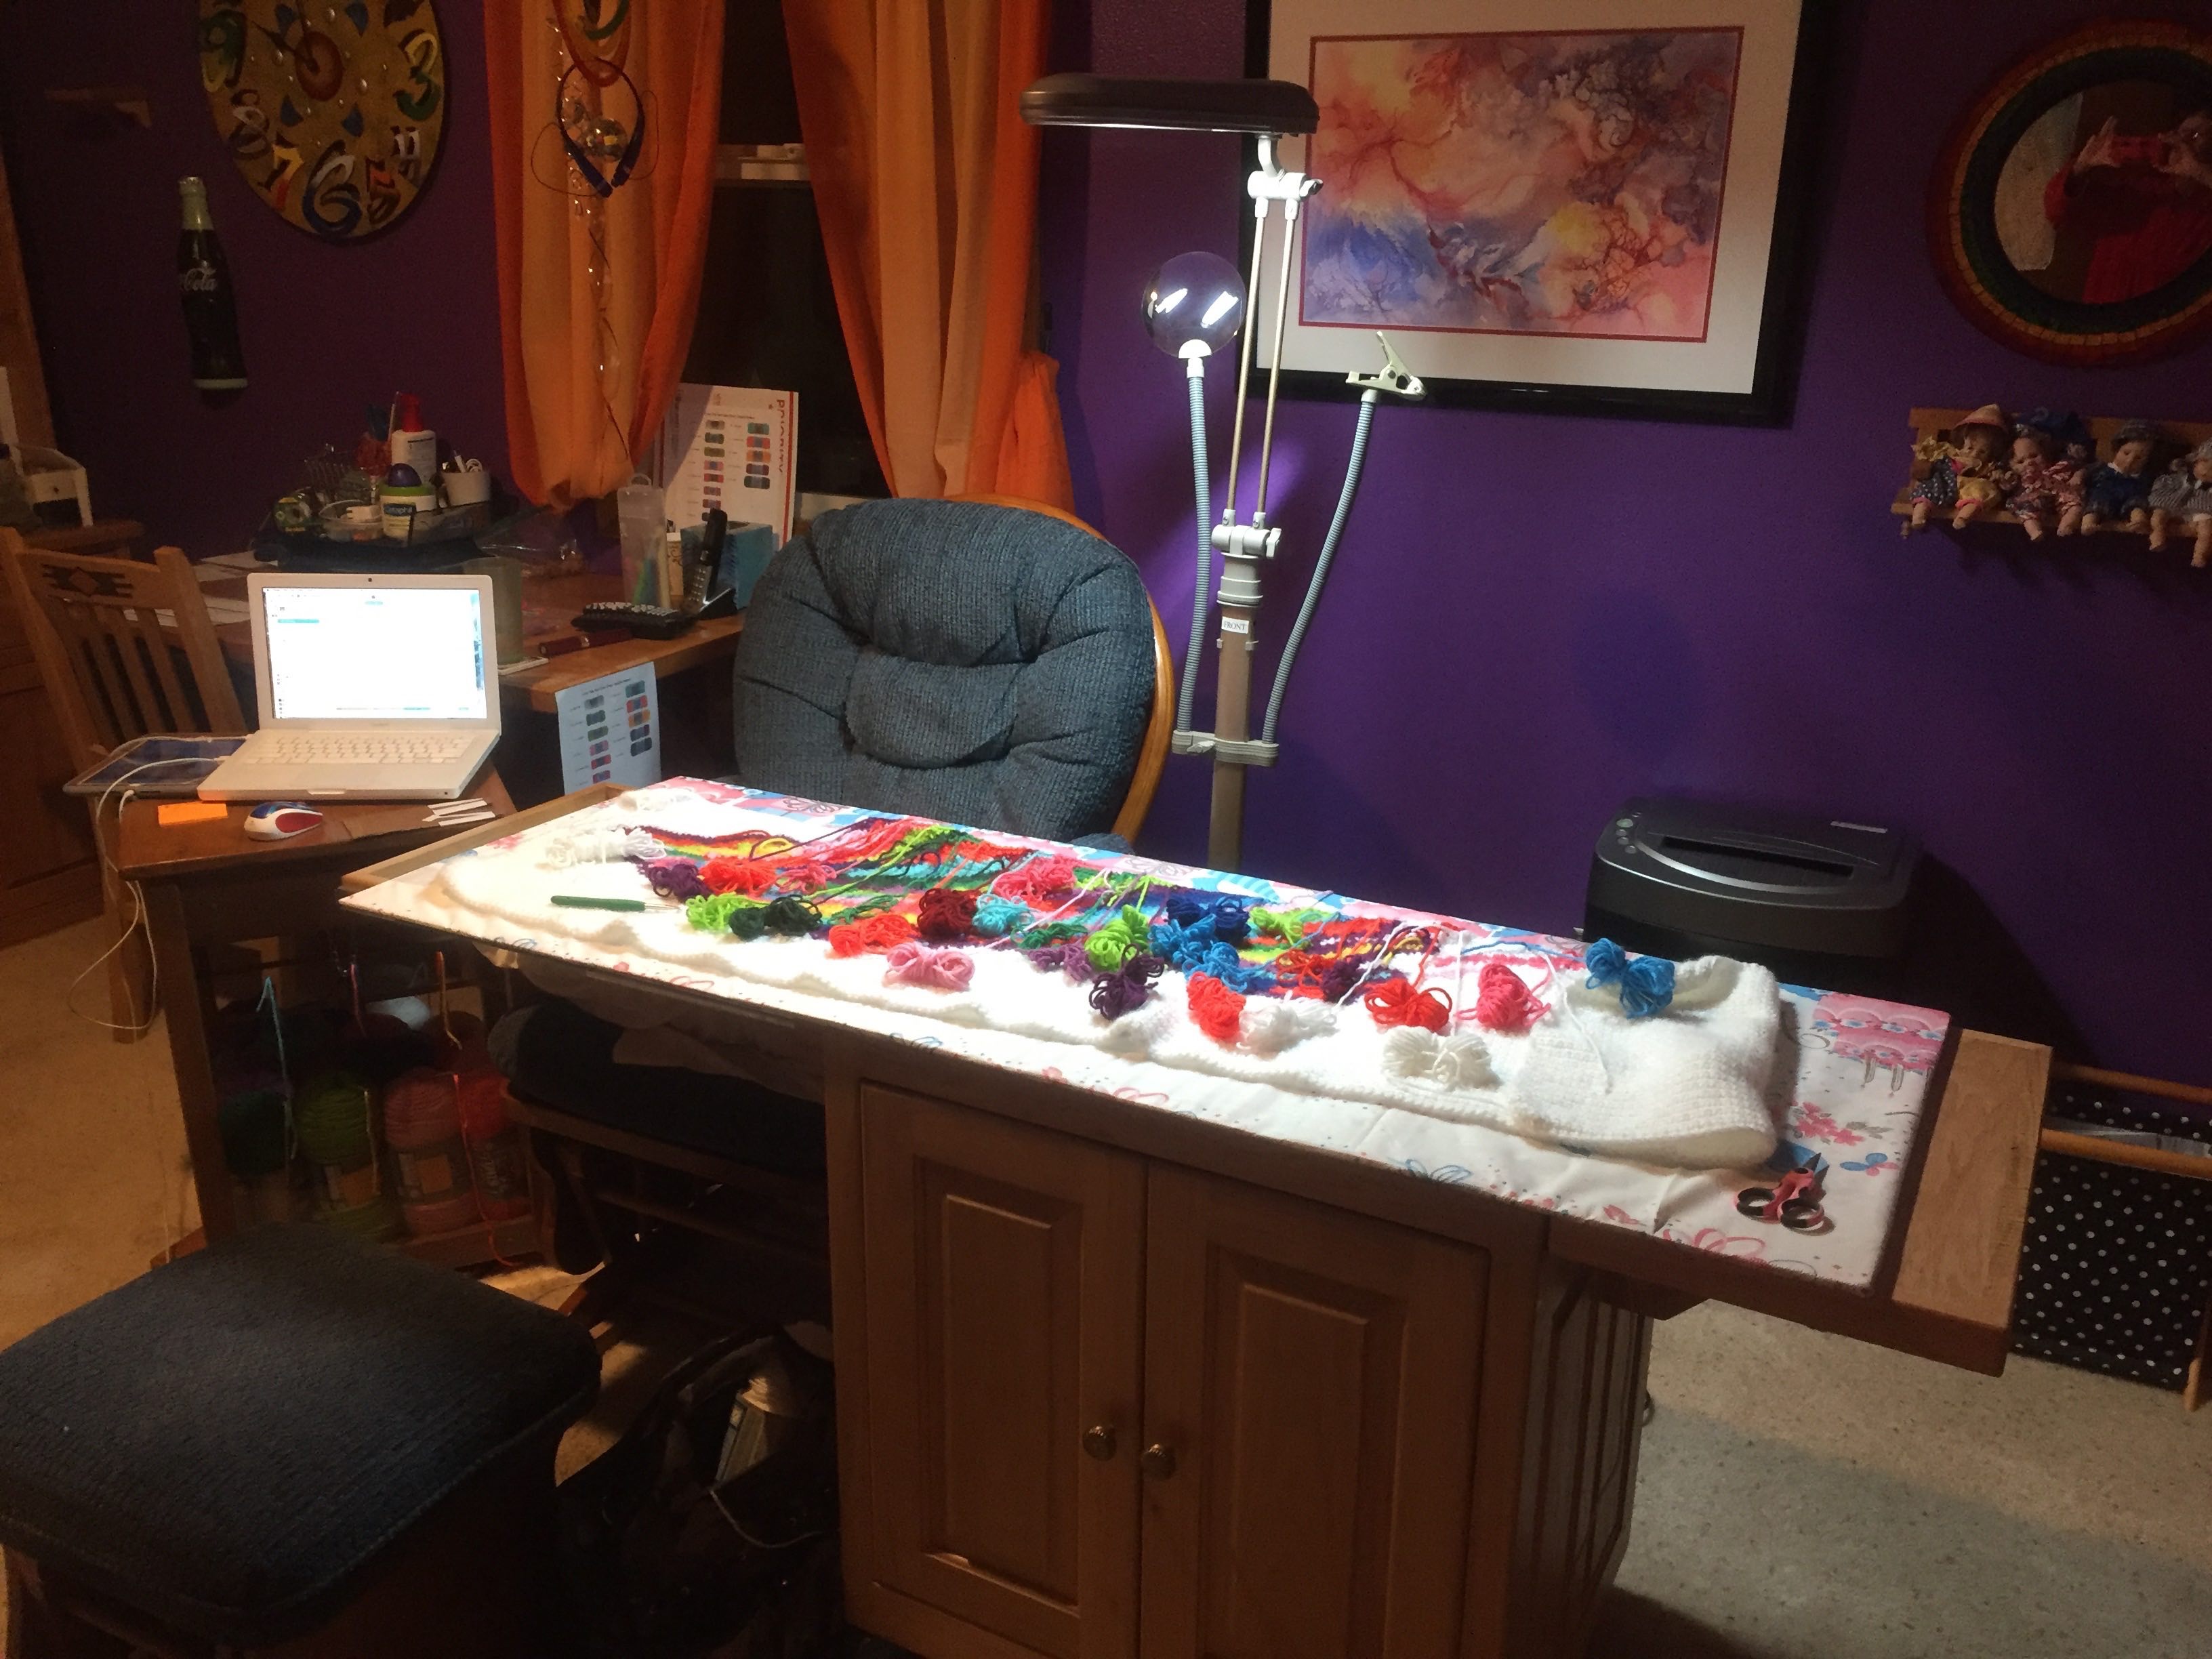
Meanwhile, during all this, I came up with an idea to make things easier when doing any project. I had my son (a woodworker) build me a yarn table. It is awesome! It sits on a lazy suzanne. It has a drawer that pulls out so one can put their needles, scissors, markers, etc. in it. The drawer also pulls all the way out, the top lifts up so you can put the yarn on the dowels (or sit the skeins upright and use it that way when having many yarn ball colors to roll when doing a word chart.) It has plexiglass on each side with small holes drilled in it, on two sides, so you can pull your yarn through it, and rotate the carousel to the other side to grab another skein of yarn, etc.
Here are pictures of this unique yarn table. (He actually made another one but it didn’t have the lazy suzanne on the bottom.) You always think of something different to do once one is built!